I LOVE these blankets. They are so warm and soft and are the perfect size for lounging on the couch, in the car, etc. I learned how to make these last year and I made 5 of them as Christmas gifts for family and everyone loved them. They are so easy to make, which is perfect for me because I am not the most crafty person and I can't sew a stitch to save my life. In just a couple hours, you can create a blanket from start to finish. This tutorial is easy to follow. I have condensed all the steps down to be able to create the blanket in the quickest time possible, through trial and error on my part over the course of making several. Give it a try! You won't be disappointed!
Materials needed-
2 yards of patterned fleece
2 yards of solid coordinating fleece
Sharp scissors
Measuring tape
Paper clips or binder clips
Pen
STEP 1
At your local fabric store, purchase 2 yards of a patterned fleece and 2 yards of a solid fleece that will coordinate with your pattern, for the back of your blanket. Fleece can be expensive if it's not on sale. I purchase my fleece from JoAnn Fabrics, as during this time of year it is almost always on sale at 40-50% off. Also, I use this website to print additional JoAnn coupons to save even MORE-
http://printable-coupons.blogspot.com/2005/12/jo-ann-coupons.html. Also, splurge and buy a nice, SHARP pair of good scissors. Trust me, you will be glad you did!
STEP 2
Find a spot in your home that has ample floor space and spread both cuts of fleece, one on top of the other, out on the floor and smooth out any wrinkles. As you will see, there are some rough edges that will need to be trimmed.


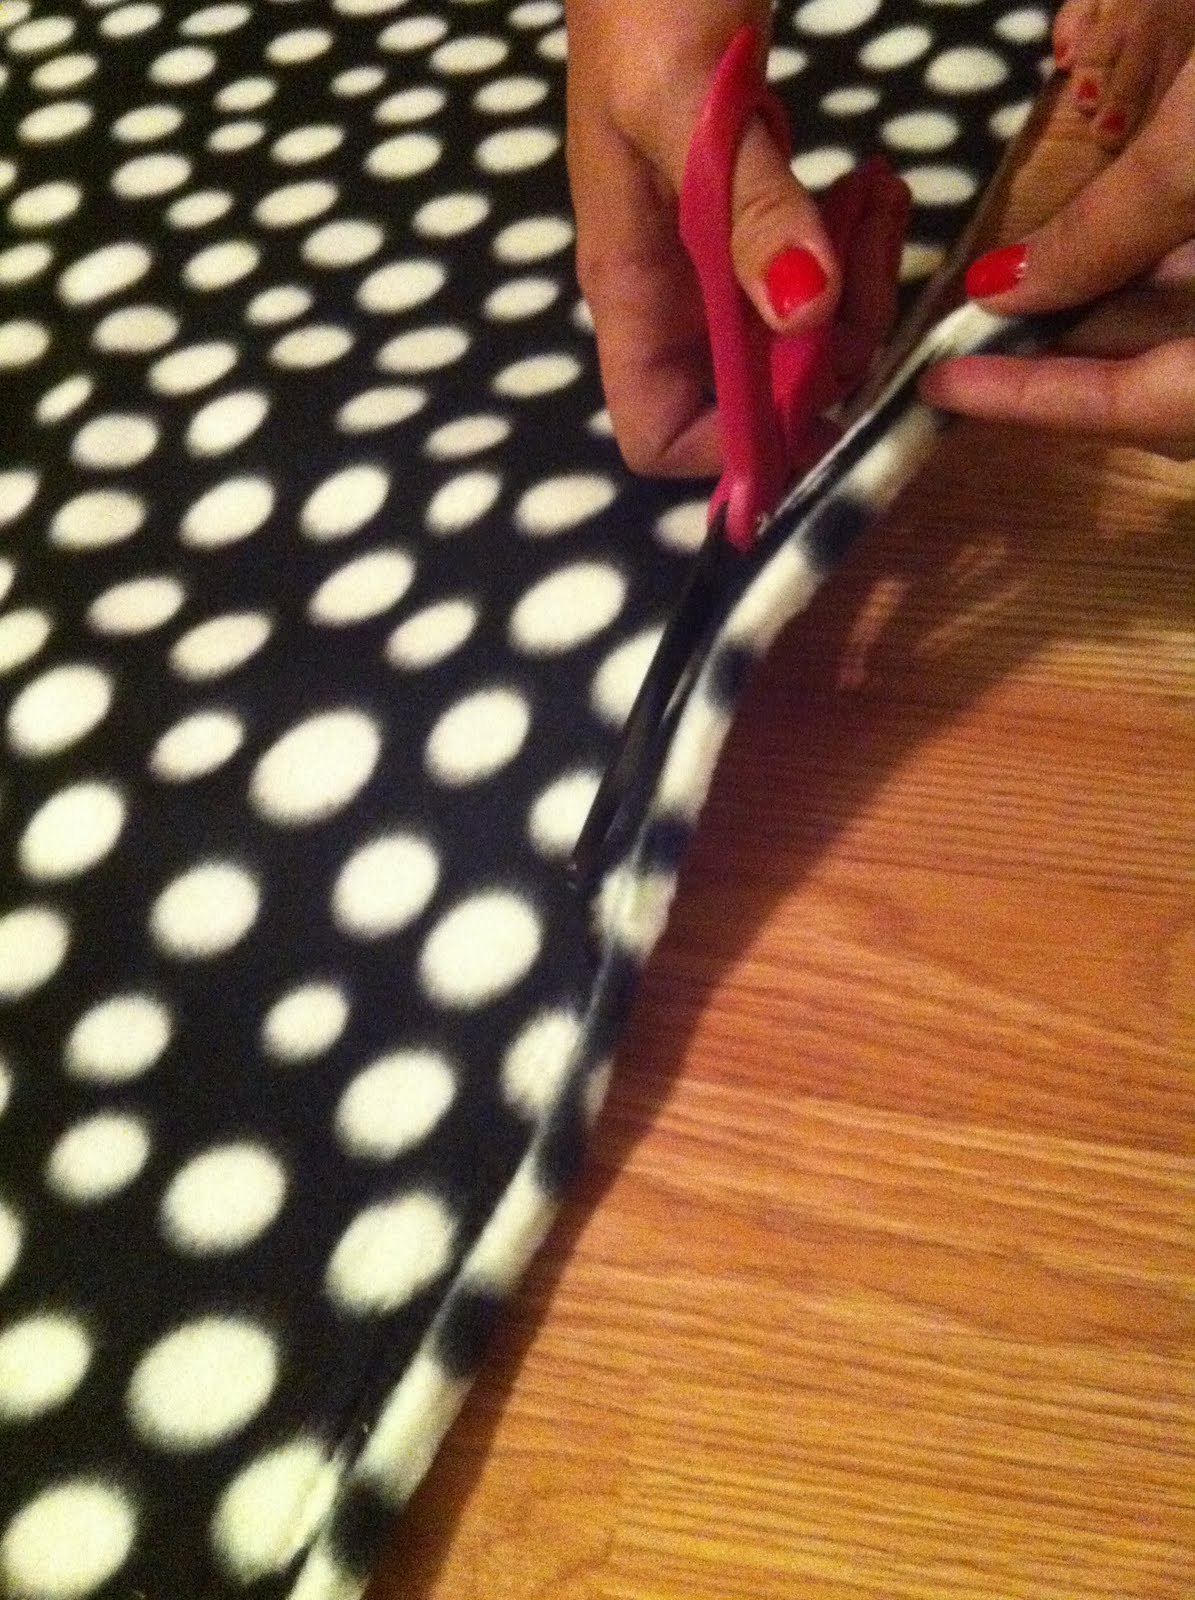
STEP 3
Using your scissors, begin trimming the rough edges so that the fleece will be the same size on both pieces, all the way around. Hold it firmly as you are cutting, but don't tug on the fabric too much. Fleece is a little bit stretchy and if you are pulling it too tight as you are cutting, it is going to warp your edges. You may need to flip the fleece over when you are cutting to make sure both pieces are even. If you don't cut perfectly straight (I know I don't!), don't worry about it! Once you tie the blanket, you will never be able to notice!

STEP 4
Next, use paper clips or binder clips and secure the top to the bottom. Clip it every 12-16 inches all the way around the 4 sides. Smooth out wrinkles with your hands as you go.

STEP 5
Now you are ready to cut your corners to make the flaps for your fringe. I have my fleece laid out with the pattered piece on the bottom and solid piece on the top. It is easier to see your markings when you do it this way. Using your measuring tape, measure from the corner a 4 inch square. Mark measurements with a pen. If you have black or other dark colored fleece that a pen won't show up on, use a white fabric marker. Measure and cut all 4 corners.


STEP 6
You will see after you have cut the corners, you have created a flap on all 4 sides. These flaps with become the fringe of the blanket. Flip the blanket over so the patterened side is facing up. Starting on one side, fold up the flap so it is straight all the way across and the fold is even, right up to the corner cut. Use your measuring tape along the center and edge to make sure you have created a 4 inch fold.

STEP 7
Next, take your measuring tape and extend it on the floor just below your fold and all the way across.

Using your pen, make a small mark on the edge of the fold at every 1 inch. If, when you reach the end there is not room for the last 2 marks to be 1 inch each, just mark in the middle so the last 2 cuts will be even. Or if remaining fabric is just over 1 inch, just leave it. You will never notice that 1 piece of fringe is slightly larger. This makes it so you don't have 1 little skinny piece of fringe on the end.

You can measure and mark all the way around if you choose to do so. I get bored quickly with spending too much time on one step so I usually mark 2 edges and then cut the fringe and tie, then mark the other 2 edges and cut and tie.
STEP 8
Now you are ready to cut your fringe. Flip your blanket back over so that the solid side is facing up. Lay it out flat so you can see your marks all the way across. Holding each edge as you cut, cut up to the mark that you made. Remember not to tug on the fleece too tight! Cut up to each mark all the way across, removing the paper clips as you go. Only cut one side at a time and tie it so that the paper clips on the remaining sides will still be holding your blanket together.

STEP 9
Now you are ready to tie. This is the part when I find a comfy spot on the couch and turn on some T.V. It sounds kind of complicated as I am describing it. But I promise, it's not! Just refer to the pictures and after you make a few ties, you will get the hang of it. Put your blanket in your lap with the solid side facing up, and starting on one end. Take the first strip of fringe (both solid and patterned held together evenly) and fold it over all the way to the end of the cut. Next, using the end of your sharp scissors, cut a slit about 1/2 inch in length through both pieces of fleece right at the base of your strip of fringe and in the center, on the fold.

You will end up with a hole through both pieces of the fringe.


Take the patterned strip and pull it up through the hole in the solid strip and tug it a little to tighten. Now pull the solid fleece strip up through the hole in the patterned strip, and tug to tighten.

It should look like this.

You can just knot both sides together if you would rather do that instead. I choose to tie my blankets this way because I love the look of how the solid side of the fleece makes a border on the patterned side. Also, when you are all cuddled up with the blanket, the knotted ones can be uncomfortable to lay on. The way I do it lays nice and flat and no knot pushing in to you!
STEP 10
Cut and tie the rest of that side. Pick another side that you have marked and cut your strips and then tie, until all 4 sides are completed. And that's it! Trust me, with a little bit of labor and time you will create an awesome gift that will be treasured for years and is great for all ages.

-Nicole
Nicole


 I just measured and screwed in the knobs equally spaced to the board and screwed the board to the wall. I then used twine to hang the lanterns at different heights. Everything else was decorations I already had on hand.