My 4 year old daughter LOVES Rapunzel. I wanted to buy her a Rapunzel dress for her birthday, so I went to the Disney store to check them out. Imagine my shock when I saw the $50 price tag. FOR DRESS UP??!! So went to Walmart. $22. For CRUMMY dress up?? So then I decided to buy a pattern and make one. $15 for a pattern. And like yards and yards of fabric. Which would probably be another $15-20. And the pattern looked really complicated and involved multiple skirts and layers....
Ouch. That's way more money and time than I am willing to spend.
That's when I hit Pinterest for some savvy ideas. It took me a really long time to find one that was as easy as I wanted it to be. Some of the free patterns didn't really make a lot of sense to me (an advanced beginner, ha!) So I found this really great idea on making a child's dress out of a t-shirt. Now that's more my speed.
I found an old shirt of Taylor's (my 4 year old) that was already unraveling at the bottom. I also found a couple feet of purple fabric at a yard sale for $1. I purchased a roll of decorative ribbon for $2 (which I only used about .50 cents worth for this project).
First, I started by cutting off the bottom of the shirt so that the skirt would start at the waist (I just held it up to Taylor and marked where I wanted the skirt to start).
Now, I wanted to add the Rapunzel- type embellishments to the front of the shirt. The base fabric I chose is the same that I am going to use for the skirt. I wanted to make it wide enough to cover up the bow on the front of the shirt. I pinned some gold rick rack on the front to look like the corset-style dress that Rapunzel wears. And sewed in in place. I chose to use the edge of the fabric that was already finished at the top so that was one less thing to sew. I'm lazy...well actually I am just limited on my crafty time- so I have to make the most of it. ;)
Then I pinned the border fabric on. Remember- right sides together! It gives you that nice hidden seam when you open it back up.
See?
I folded the top corners down and pinned it to give it a more finished look. And sewed them in place.
And added on some ribbon at the last minute. Since this is decorative ribbon, I just sew it directly to the front of my embellishment.
And folded the corners of the ribbon down to make it look nice. Pin it to the front of the shirt. Make sure you only pin to the front of the shirt, careful not to get the back of the shirt ;) I stuck a DVD case inside the shirt to help keep the front and back separated.
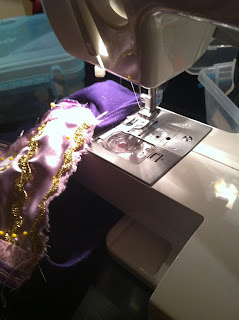
Maneuver it on the sewing machine so that you are only sewing to the front of the shirt. Its easy to do because the t-shirt material is stretchy.
There. The top of the dress is DONE! (well, almost. I actually used the ribbon on the sleeves to make a stripped effect... you will see in the finished pictures. I forgot to take pictures of it. But its the same concept as above)
I took a few feet of the purple satin material and made the skirt. If you don't know how to gather, this is a great tutorial here http://www.sew4home.com/tips-resources/sewing-tips-tricks/gathering-ruffles-made-easy I use the straight stitch method.
I also found some cheap purple sheer fabric and made an overlay with it. I didn't sew it together like I did on the main skirt because I wanted it to be open in the front. I added more of the ribbon to the edges. I centered it on the main skirt and sewed them together.
Now its time to sew the shirt to the skirt. Turn the shirt inside out and upside down and fit it over the skirt. So you are shoving the top of the skirt through the neck hole of the shirt... make sense? Same concept as right sides together. Make sure the center of the shirt is lined up with the center of the skirt.
Now, pin the shirt to the skirt and sew it in place. Take your time, making sure your fabric is pulled tight and you are not accidently sewing lower parts of the skirt up to the shirt. That would look funny ;)
Now turn your dress right side out and tah dah!
(see the ribbons on the sleeves?)
An easy, cheap, comfortable, washable, durable princess dress. I have already washed it once. Hang dry.
My lines are not straight. But Taylor didn't notice. Like I said, time crunch.Taylor was pretty happy. And I was happy. I don't care if she plays in it, eats in it, or jumps in it.


1 comment:
Wow! Great article, here I can recommend our wholesale princess dresses.
Post a Comment