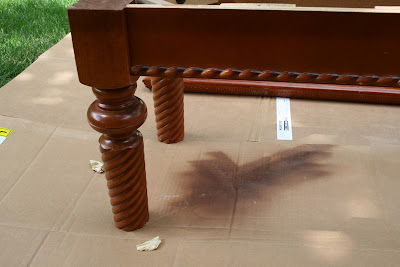
My mom gave me this sofa table about a year ago and I knew I wanted to make it into a bench but just hadn't gotten around to it. I LOVE the detail in it and I knew black glaze would look awesome in all the carvings.

I took the legs off (I accidentally deleted that picture off my camera and didn't realize, DUH) and sawed each leg so they measured 16 inches long. I then put the legs back on.

Here's the primer and paint I used. Walmart is the cheapest place to get the Krylon spray paint. I got the primer at Home Depot. It's the first time I've used this brand and I really liked it. It took 1 can of primer and about a can and a half of paint.

GLAZING...
It intimidates a lot of people but it's SO SO simple. I got this can at Home Depot about 2 years ago and I still have 3/4 of the can left and I have done a ton of projects. It last a long time! You get it in the paint department and have them tint it black. Make sure you check the color and it's black enough. You don't want semi black glaze. They will add as much black as you want.

Then take a damp rag and wipe off what you don't want. The glaze will stay in all the nooks and crannies.

Making a NO SEW Pad...
Foam is so expensive! JoAnn's has a great selection but make sure you have a coupon so you don't have to buy it full price. You can join their email list to get coupons or FYI they accept competitors coupons. Luckily my sister had some foam she wasn't using so she gave it to me. :)
I traced the top of the "table" with a marking pen.
 I wrapped the foam with quilt batting and hot glued it to the back. Then I wrapped the material the same way. Make sure when you glue on the material pull it tight so you have a tight fit. I wasn't concerned about the way the under side looked as long as the top looked good.
 Just wrap the ends like you are wrapping a present and glue as you make each fold.


3 comments:
LOVE it Adrienne! It look so great! Thanks for the step by step painting and glazing...I need to try it now!!
That looks great! Thanks for sharing it with me! xoxo
Love the bench! When I saw it at your house I thought you bought it from a furniture store already made. darling idea
Post a Comment